Created with Admarket's flickrSLiDR.

Wednesday 2 September 2009

Light up my life

Last time I tried to take photos of my work, it took me 4 hours to photograph 10 items.
The sun moved too much that the position I setup in was useless midway into the "shoot" due to shadows from hanging branches.

Those little damned green flies kept sitting on my background paper and wouldn't go away when I blew at them (whilst kneeling on one knee with one hand on camera reaching awkwardly over to rid the scene of them!).

The background paper I had taped into position to some lawn chairs had seperated from the wind howling and bending and tearing the paper.

I nearly lost all feeling in my legs while kneeling on the concrete bending over and peering into the camera.

I had enough! Time to get myself a professional photography studio and leave all that drama behind....

you know how much that would cost? Forget it. I needed to figure out a much cheaper alternative....a light box. Not just any light bow, but a homemade one!

After scouring the internet, I found several amazing sites with instructions on how to build a variation of light boxes with plumbing tubes, boxes, lamp shades and ikea products....to name a few.

I settled on the Ikea option with instructions from PlanetJune, as seen here:


I thought I'd send along my step by step progress of assembling my photo box to show you how I achieved it!!
1. Get the Antonius Hamper Frame from Ikea http://www.ikea.com/gb/en/catalog/products/10103804. Only £5 - what a bargain.


2. Get some type of white fabric. I chose a cotton sheet from Ikea because I was there and it was cheap. You could get white fabric just about anywhere, but in the UK, no Joanne's Fabric or Michaels to hop to in craft emergencies - so Ikea it had to be...


3. Cut 3 large rectangular pieces from the fabric, using the frame as a guide, cutting 1.5 inches or so bigger than the actual frame size. Do the same for the two ends, cutting smaller more square pieces. Start pinning them together on the frame to get a good snug fit.
4. After pinning, start sewing your pieces together. Put it on the frame to check the fit and adjust where necessary.

5. Start figuring out the lighting!

This is something I haven't had much luck finding! Many thanks to all the Etsians and countless blogs that I have reviewed for some more insight into the appropriate bulbs to use for this light box.

Being in the UK reading US blogs means I cannot take advantage of the great product suggestions available at all those great US hardware shops. In London, B&Q and Homebase without the Lowe's, Home Depots and Walmarts, don't seem to even have a small portion of the selection of bulbs I would have available to me!
I have resorted to online ordering which isn't so bad for ordering the bulbs. However, finding the appropriate light fixtures has proven to be much more difficult!!! Can I ask all of you out there, where did those clunky old clamp-on desk lights go? That is a blog entry for another day...

However, for the bulbs, I can gladly report my decision based on the advice of loads of Etsians:

I am ordering the trumpet low energy compact fluorescent daylight photo bulbs.
They are a bit wider than the usual bulbs, but it seems loads of people have had a lot of luck with them. They have a kelvin temp of around 6000, close to daylight as possible.
The width of them makes finding a lamp more difficult, but I am determined. More on that next time.

I'll post photos of some test shoots as soon as I sort out the lighting!

Monday 20 July 2009

Does training for a 1/2 marathon and potting mix?

Hmmmn, that would be a big fat NO!!!!
Every morning that I train, I cannot help but be extremely exhausted and useless the remainder of the day! Sadly, with my impending race next weekend, more training sessions means more useless days.
I did have one to two really productive days this past week.
First, I managed to clear 118 test batches of glaze. Yes, you read correctly, 118 batches of 100g glaze pots, built up over 2 years in my endeavour to find that perfect glaze and slip. Can you believe it took over 3 hours to scrape clean into plaster batt (to dry for easy dumping into toxic section of my local recycling/waste centre) and scrub the pots clean. Man, that was a workout in itself! However, what a great feeling it was. Not only did it open up space in my already cramped pottery, but it was a realisation that I had reached the end of my journey of researching, developing and testing.
Once thought of as the unreachable goal, I find myself emerging on the other side of that excrutiating long dark tunnel I have been crawling through for years. I feel like I can finally start enjoying the creative process again, now that I have some decisive conclusions about the clay, additives, slips and glazes I will be using going forward. No more juggling between 22 strains of stain concentrations tested amongst 6 different types of slips which lie under the choice of 15 different glazes, all of which can be applied on top of 11 various white clays. You get the point. The variables have narrowed to a manageable amount.
I have my chosen materials and batches of slip/glaze.
I know how my kiln fires - knowing the hot and cold spots and how best to fire my chosen materials.
I know the forms I want to make and sell.
I have even managed to simplify what it is that I am making - reducing the types of forms on offer, streamlining the making process to a more suitable level of ease.

This leads to the second productive day of my week: I actually started making my new forms and it felt so good just to create, knowing exactly what decoration I was going to apply rather than settling with some undeveloped glaze cover for the sake of finishing the form off. How great did it feel!!! Now I just have to fire and assemble the goods to see how they look!

So, from now on it is time to keep moving with my prototypes and emerge from my long retreat and show everyone what it is that I can offer the world.
A very exciting time! Perhaps all these years of slogging it behind the scenes with scores and scores of okay ideas always seemingly resulting in bad outcomes will actually start paying off!

So, after next weekend's big race, I can only imagine what more energy from reduced running will bring to the potter's wheel! I cannot wait!

Thursday 9 July 2009

Just how specific is this darned specific gravity?

So, there I was remeasuring the specific gravity of my orange glaze, making sure it read as it should from a month ago. Good news, it read the same. Bad news, it looked so damn lumpy and so different from a month ago, I really couldn't believe what I was seeing.

To appreciate the amount of frustration I was feeling at that juncture, I must go back 2-3 months ago when I undertook the painful process of understanding my glazes more. With every kiln firing producing various results, I had undergone the necessary cone fire testings to ensure the right controls were in place and that I was firing evenly and consistantly. After cracking that issue (mind you, that took about 4 months....), I started reading up on how to get my glaze consistancy constant (say that over and over again really fast- I dare you).


I started with hyrdrometers and after reading bucket loads of info on potters.org, decided against persuing that angle. However, the good people on potters.org recommended using SPECIFIC GRAVITY as a reliable method for measuring the amount of water (the consistancy) in a batch of glaze so you can replicate it every time you make up a new batch.

So I eagerly and dutifully tested all my glazes at a thick, medium and thin consistancies to better decide which one was best for the glaze. Once confirmed, I made sure the batches were well mixed and measured the specific gravity accordingly. In fact, I did this three times to ensure little to no room for error.

This is why after re-measuring the batch recently and recording a same specific gravity as before, I was dumbfounded to see a thick muddy pool of glaze. Help!!! Does this mean I cannot even rely on this measurement either? I don't want to go back to sticking my finger in the batch and measuring thickness by just how much of my skin texture can be seen through the glaze film - too much room for error!

Anway, I will proceed. I am ready to dump these glazes once and for all and streamline to one reliable glaze - is there such a thing!?!


WOW - I have been such a bad blogger the past few months! I have been too busy going away like a little jetsetter on holiday to Tobago with my hubby! It was the first holiday with just the two of us that we have had in so many years!
I was hoping to find inspiration where we were, with the flora and fauna of the beautiful island providing me with a feast of ideas to explore in clay. Instead, I found that my initiative melted away in the 30degrees plus Celcius sun and I couldn't really get beyond rubbing my sunscreen on every 15 minutes. Man, that was a lot of work anyway!
What I did discover was an incredible sense of calm and centredness. No time constraints, no plans, no dressing up, no make-up, no brush (!), no noise, no pollution, no rushing, no one to answer to, no diet, no mirrors (that IS the best way to start chilling out ladies!).... just plain and simple R & R.
It is really so true what they say about the positive impact the sun has on us. Those rays and a quiet connectedness with nature really brought my mind back to the basics: eat, sleep, and be merry. How nice life could be if we could always have it in our minds to seek no more than what we need and to enjoy what is around us.
I was so very hard to get my mind back into gear after getting home - a good week. And now when I begin to stress, I close my eyes and remember all those moments sitting on the beach when I told myself to just listen to the waves rolling in, because it is that sound that I can hear now when I need to escape.
So, rambling over. I'm off to fire my kiln tonight.

Wednesday 20 May 2009

My new project!

I finally worked on something that has been in my sketchbook for a good 2 years or so now!
It was so very relaxing and I am so pleased with the outcome!

Picture three of these next to each other in a wall hanging, or a massive singular flower plaque on its own! The options are endless!

I'm a little worried I might get swine flu

with all these pigs around!


Monday 27 April 2009

Coloured clay! Results are in!


I must confess, I've had these results for some time now, but just hadn't gotten around to posting them!


As you may recall from previous posts, I went ahead and added three concentrations (2, 5 and 10%) of stain to my semi-porcelain body to see what results I would get...


Here is the lilac, which I don't think really looks lilac at all...


The green which I thought was best from the two I tested:

I thought this green was a bit too mint gum looking!

Here is the blue. Oh, the different finishes on each bowl were two differnt glazes on either side with coloured clay exposed in the middle, which honestly is my favourite part on all of them! No glaze, no hassle!

Shame that I like the mandarin so much, as 100grams is THREE TIMES MORE EXPENSIVE than the other stains. Damn!

Out of all the tests, I settled on these particular shades for each colour to make up my pastel pallet.


Now that I have tried adding stain to this clay, I am very intrigued and excited to explore this further. However, looking at the price of the stains, I now realise my my instructor never wanted us to go near them!


Tuesday 21 April 2009

Round Two: Piggy Banks with stained clay and glazes

Well - my first go at using coloured clay in an actual item finally came and went . It was so exciting getting the coloured piggy banks out of the kiln! As I made them, the percentages of stain in each clay body didn't really look like much but once fired with a clear glaze over them - they looked fab!


What was really upsetting about the entire exercise was the costing of the pigs with stains inclusive! After punching through my numbers, pigs with NO stain cost 3/4 less to make than those with stains!

As Joe and I had already agreed a per pig price prior to use of stains, my profit margin shrunk by a third when I added them in! No good for me!

Luckily, the results of some glaze tests with stains in them also came out of the kiln at the same time as the pigs! I had tested 2, 5, and 10% stain additions in two white base glazes. One didn't take the stains at all, but the other really reacted!

I tested green, a pink, blue and yellow - here are the results! I LIKE!


When examining the costs of adding these to the glaze instead of the clay, it worked out to be a far cheaper alternative! Joe ended up liking the results as well, so to save costs we decided to go forward with the coloured glazes.

The only thing left to do now is see how my new ceramic transfers with Joe's company's logo that I ordered from Ceramic Digital will look on top of coloured backgrounds!

Tuesday 14 April 2009

Visit to Lacock Village and Pottery

Over Easter Weekend, Joe and I planned a trip to Bristol, hitting various National Trust sites (click here to see my blog about the cool properties we have visited) along the way.

We rolled up in one village arguing that it sounded vaguely familiar but not sure why.

Lacock, voted the prettiest village in England at some point (or so Joe told me!).

Then it dawned on us - we had been here before with my Grandparents when they were visiting around Easter last year! Before, our visit was on a very unforgiving day weather-wise and we had collapsed into a fabulously warm, welcoming pub all toasted up with roaring fire and drool inducing homemade dishes. It was dark and rainy that day, but I remember seeing a pottery sign which upon further inspection, revealed a quite gallery space closed for that day.

So, little did we realise that the National Trust's Lacock Abbey was indeed in the same place as that fab pub and village we stumbled upon before.

This time, full daylight with cloud greeted us as we drove in, but the village was buzzing with littl-in's and parents on an early Easter Egg hunt through the streets and businesses in the village. And guess what, that pottery was open!

Take a look at this grand and beautiful property! Believe it or not, it is David McDowell's pottery, gallery cum bed and breakfast all in one!


As we stepped into the gallery space, David was walking up the back steps from his pottery to greet us visitors. After introducing myself, he graciously offered to show us around!

David was so busy, but spent over an hour showing us around and making us feel so welcome. We found out that over 20 years ago, he had to apply to the National Trust to live in this building, taking it over from the previous dweller, Robert Fournier (yeah, the man who wrote that awesome Pottery Dictionary that I love)!!!! Most of it was is in shambles and he restored it during every bit of limited free time that he had while running pottery classes to make the dosh! (Forgive me if I got this wrong David!!)

The location is superb, across from this amazing church, just at the end of the village road.


His kiln building out back was derelict when he moved in and it now houses a handmade massive gas kiln and quite an impressively organized wall system of props and shelves (the envy of any potter really!).

The icing on the cake for me was his big ole pottery in the lower ground of the house (under the gallery which the steps lead up to in the photo below) and all the fab pottery scattered around his B&B. He has Wally Keeler, John Maltby, and many others all just hanging out together on shelves - cool, eh?!
Here's Joe, David and the rhubarb!

He showed us around the house and then asked if we wanted to come to his allotment to pick up fresh rubarb and rocket for dinner that night. Well, if the set-up wasn't making me drool already, come on - how much more idyllic can this get!

It can! The allotment happened to be at the end of a path winding around the church beyond a lovely stone wall and locked wooden door. And check out that rubarb! My Aunt Rose would be so envious!

Needless to say, I had effectively died and gone to heaven in that afternoon. I had found my utopia....Joe was a little giddy too, although not convinced about my sudden desire to be a B&B owner...

I just cannot thank David enough for being so great to us! His pots, rhubarb and B&B are all fab!

Anyone interested in staying, here is his website. Well worth the visit! Lacock itself is pretty much smack between Bristol and London, close to Bath and very lovely countryside.

Did we even make it to the Abbey - nah, but who cares! What an afternoon!

Saturday 28 March 2009

Pigs coming out of my ears!


Hubby Joe was kind enough to offer me the opportunity to submit a quote (is this how you say that?) for an order of hand-made piggy banks he could use for his business, MyEggNest.com.
Now, I personally think I've won the contract (even without submitting a quote), but he was quick to clarify that my status as "wife" had no bearing on this process at all.

Hmmmn, I guess I will be taking this seriously after all, considering I need the money and I need the experience learning how to cost for purposes of winning contracts in the future.

So, after looking back at some earlier research I had done on this subject from a few years ago, in addition to some training I recieved at a CockPit Arts session AND recent reading - I figure I will need to do the following:
  • make a prototype of the item, making sure to calculate clay and other materials used per unit

  • once prototype reviewed and accepted by hubby "aka...client" make a few more units, taking care to quanitify time required per unit, and reconfirmation of clay and glaze materials (and any other additional items needed) used per unit
  • determine cost of firing items. THIS IS DATA I HAVE BEEN MEANING TO GET FOR A YEAR NOW but haven't gotten around to it. Get the kilowatt/hour charges from the electricity supplier and work out the rates....

  • consider my wage and profit margin
  • add all costs together for each unit, use this to determine total cost for total order

  • figure out time frame required to complete order

  • submit quote and keep my fingers crossed!
I guess this is a process much in keeping with the design brief concept I used to touch upon with my students in the City and Guilds 7922 Ceramics course. Sadly, I never had that much experience with this process so my students kindof lost out on this front.

I am wondering what other potters do to win contracts or orders?

About two years ago, I did go through an intensive exercise similar to this in preparation for an open house in which I was going to be selling my wares. Although I didn't have a client as it were, I did work to a very strict record keeping procedure, logging every minute and ounce of materials used for each item I made. This real data was then used to calculate a final price for each item, taking into account margins, wages, etc. What was shocking to me at the time was just how much everything was going to cost if I paid myself a decent wage!!! In many instances, the forms were coming out at double what I knew was reasonable to charge.

I wonder with a bit more making experience under my belt this time around that my making time will have decreased, thus reducing the total wages i would have to charge.

Who actually works these quantities out? Are potters actually, on the whole, charging a total price which accounts for a wage to be earned? I would love to hear from someone who does!

Well, to end on a happy note, here is a photo play by play of my journey making piggie banks!

These little vases had no idea they were turning into little piggies!

After a little bit of work, they emerge as very happy pigs! I wonder which one you like best - I need some help on this one!

With cute bottoms!


Thursday 19 March 2009

Colouring clay

Last month, I decided to join etsy. After spending a long time looking at other potter's shops and their policies, I realised that shipping was going to be a big issue for me. I noticed the shipping charges for US sellers to US customers was expensive which had me worried about what I'd have to charge to sell to this US market from the UK.

I "mock" packed various items in bubble wrap, peanuts and a box to get some sample shipping weights. I then went onto Royal Mail to to check out the rates for regular first class international vs insured international. Can you believe the rate to send one mug insured was roughly $30?!! I nearly fell over! The cost to send regular post was $16 which is the cheapest I could get it.

So, out of the two items I managed to load onto etsy, one (the set of bowls) has the $16Us/$6UK regular international delivery charges for an item that costs $40 for set of 2 AND the other (the mug) has the $30US/$10UK delivery charges for an item that costs only $18! Obviously, I decided I was gonna have to sort this out!

In my efforts to get items loaded onto etsy, this whole delivery issue really threw me, so I decided to stop until I figured out an alternative to sending bulky pots over the ocean.

My first option is to look at making smaller, lighter objects. The other would be to go with folksy, a UK alternative to etsy!

I haven't gotten around to getting loaded onto folksy just yet, but had a look around. The great thing is it looks like less than 10 potters are on there right now, so it isn't saturated just yet!

In the meantime, I have been doing some tests to formulate some of my ideas for lighter, marketable items to crack the US market with! I'm gonna keep them a secret for now, but I thought I'd show you the testing side of the delevopment of these items because it is really exciting for me!

Okay, what I am really going for here is coloured clay. I started by weighing out same size balls of clay (all kneaded) and three different percentages of a stain for each colour I wanted to try.

So, 3 balls. 1 ball with 2% stain added; 2nd ball with 5% added and 3rd ball with 10% added. I was testing 6 colours, so that made a total of 18 tests!

A lot of potters on potters.org recommend when mizing clay to wear gloves and protect your surfaces with a barrier like plastic. Well, I didn't have anything slightly pourous that I could use other than the table and well, you can see that the gloves didn't work very well either!

These were the first set of gloves I worked with and had to stop. See that texture there, NOT good for mixing clay! You are better off with plain smooth gloves.

This set of gloves were less flimsy but still somewhat textured. They didn't work either! In the end, I used my hands....

Here are the finished balls ready for throwing

Taadaah!!! Cannot wait until they are fired!


Wednesday 18 March 2009

Myetsy shop

Well, it took two hours yesterday and esty online help, but I managed to create my banner on etsy!

I worked with gimp, a free piece of software alternative to photoshop and let me tell you - it ain't easy for graphic illiterates like me!

But, anywho, here is one photo I started with:

On gimp, I managed to reduce it to 760 pixels wide by 100 pixels tall and came up with the following banner. Oh yeah, and the coolest thing was the insertion of groovy text (free from dafont!) for my company name!


Another photo I used was:

And, again, with my amazing gimp abilities, I transformed it into this:

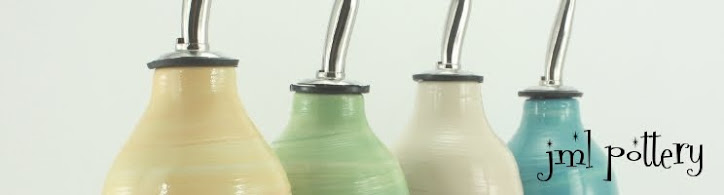
I decided to use the latter of the two, as seen here on my etsy page!


To get great advice on how to do this yourself, click here for etsy tutorial!

Come visit my etsy site! Okay, it is a work in progress, but I promise it will be updated soon!

Tuesday 17 March 2009

Testing Testing 1 2 3...

This is a quick one to test if my RSS feed to my email account is working!

Tuesday 10 March 2009

Slide Silde Slippedy Slide...

Last week I worked my heart out making pots to fill up a test kiln firing. I thought I would apply some of my newly formulated coloured slips to see how they turn out once fired and glazed.

As promised, here is one set of mugs that I resolved the whole "how do you handle a slipped mug" thing. While I was pulling the handles, I was thinking about all the horror stories I have read on potters.org about semi-porcelain cracking issus with all sorts of appendages. Man, I was dreaming that that would be the only issue! This clay is a right pain trying to attach to itself. My Lord! After the trauma of attaching the stump to the mug, pulling the handle wasn't too difficult - the clay wasn't short like I thought it would be - Thank God!

Here are two examples of top handle attachments... I think the green one is much more stable and nicer looking! The pink one looks a bit weak.


However, attaching the bottom onto the slipped surface turned into a real problem. Again, I keep approaching things like my old stoneware so I didn't bother scoring the surface of the mug to get the handle securely attached. Well, that didn't work too well, it kept sliding off. And, me being the usual slow Jami, it didn't dawn on me to score! Doah! I just kept doing it the same way with the same bad result! It wasn't until I walked into the pottery a few days later when the wares were completely dried did I see a few of the bottom of the handles popped completely off!

Mugs before they dried and handles popped!

I never had this problem before! Goes to show how important it is to be aware and willing to adapt your tried and tested ways to new materials. Harsh lesson to learn.

Overall, the whole idea of pulling a handle off a partially slipped pot seemed to work. I think it really limits the form of the mug, a design consideration that is born entirely out of ease of handling rather than ease of use once finished. And this is somewhat backward thinking that I am not too certain about right now.

I did another set of mugs that I thought I would apply slip to the entire surface. As a result, I wouldn't be able to pull any handles off the pot, as the slip would be destroyed. I plan to research and make my own plaster mould for a handle that can be cast and attached quickly and mess free onto the slipped pot. I think it will be some time before I can get that sorted and tested.

In any case, here are the prototypes ready and wrapped now, awaiting that elusive cast handle:

Other items I slipped were a big shallow bowl which I threw to test the throwing, turning and drying behaviour of the new clay. I sure do love those chunky swirls. I DO hope they come through nicely under the clear glaze once fired.

Let me hear a shout out to all those potters who like their pots better leatherhard than fired!!!


A final exercise for the day was attaching my spout to my cylindrical body to make a big ole bottle. I had taken photos of that work in progress but wouldn't you know it, I managed to delete the darn things.

Anyway, this is the finished form before slip applied and after; it's a height of about 17 inches min:


Okay - off to get some more pots made!

Monday 9 March 2009

To everything, turn, turn, turn....

There is a reason, turn, turn, turn....
Was that the Byrds who sang that tune? How appropriate! Saturday in the pottery was full of turning out both stoneware and semi-porcelain pots.

I found that all the semi-porc pots with the added molochite made for nice and easy turning, with an attractive tooth when scraped. The non-grog samples did well too, making a nice plain smooth finish which will be very useful for slip application. However, with that said, I am wondering if a little tooth wouldn't be better for the slip layer to adhere a bit better (I'm thinking about the DIY system of scratching gloss surfaces to allow better adhesion of paint, filler, etc...)

Will have to apply slip to both clay compositions and see!

Wow - this semi-porcelain can be tempermental in the turning stages as well! You really need to catch it at just the right leather-hard stage. A bit too soft and it really seems to "melt" and expand out of the solid mass it has become. A bit too hard and it chatters.

As I have read loads about the pitfalls of porcelain, one thing I am super worried about is application of handles, as these appendages seem to give loads of potters sticking issues when applied to porcelain bodies. Many potters recommend working with the clay as soft as possible. Others say SLOW DRY once handles are attached. Frankly speaking, I am not going to be working with pulling handles when the clay is leather soft - too difficult!!! I am just going to have to apply when firm, slowly dry and pray.

One interesting characteristic of this semi-porc clay that I have noticed is it's dislike of handcarving. Whenever I try to hand trim certain bits of the clay, it wants to crumble and break off into frayed segments, much akin to a fired pot shivering. How odd?! However, when I using turning tools with pressure on a fast turning wheel, no such problem occurs. Hmmn - anyone know why this happens? Anyone?

With all my mugs turned, I began to think about slip application and immediately stumbled upon a dilemma. Ultimately, I am going for a fluid, textured application of coloured slip all over the piece. Dipping of slip is not an option and I would imagine applying it after adhering a handle would only make for one messy outcome as the handle would only get in the way of the nice horizontal brush strokes I am trying to achieve over the entire piece.

The only solutions I can come up with are:
  1. apply slip prior to "handling", but only in between the two points where the handle would stick to the pot

  2. apply slip just below the top join of the handle (as lots of touching to get handle adhered here would mess the slip up completely). The bottom join is easy to attach to the pot without ruining the slip decor so that won't be an issue. This would result in all vessels having the upper 1/4 or 1/3 without slip. A design consideration not taken likely, because it would bear influence on all other forms in my repertiore when trying to keep the "look" cohesive.

  3. apply slip all over and get a plaster cast handle to attach cleanly and precisely to the body without messing the slip decor

I'm leaning toward the cast handle even if I am apprehensive to do so. Apprehension is born out of worry that all those who have taught me to pull a good handle (and other professionals) would view my use of moulded handles as a way to overcome a lack of basic skills in handle making. Should I care? Probably not, but it does come into it a bit.

I'll be attaching handles tonight to some without slip, as I am also developing coloured glazes which I want to test out. Others I will go for the 1/4 not slipped look with a pulled handle and a final selection will be put aside for use with a plaster moulded handle...I'm thinking you nor I will see that outcome for some time! I'll post photos of all as they progress!

Another interesting development on Saturday was just how exciting it felt to make items that would test the strength and adaptability of this new-fangled clay when cut and joined into new shapes and forms. I found it very nice to alter and add bits to each other. I guess the proof will be in the pudding - once fired, confirming that no unsightly tension cracks appear.

Here is my "bubble" wall-hanging in the making, step one:

I'll be sure to post photos once glazed and fired.

Thursday 5 March 2009

What other P words can I congure up when thinking about porcelain?

Painful

Problematic

Punishing

Wow - I wanted to introduce semi-porcelain into my repertoire, so I started with a series of tests back in October to test it's plasticity over a wide range of forms (wide and low serving dish shape; bottle form, tall cylinder, small and large plate, etc...). Lots of warpage and hairline fractures in the gloss firing.


So, first go, not too great.


I decided to see what the experts had to say on potters.org about clay body additions and molochite seemed to be a popular choice so I went ahead and tried two grade additions in two two different quantities. After some testing, I decided 30s grade too bulky (see below) and 80s grade much better. Went with 5% addition in the end, as 10% seemed to really open the body too much and cause way too much tooth when turning.


Since I had settled on the molochite addition, I needed to see if I could get the clay up to 12 inches on the wheel, quite an achievement for porcelain in what would ordinarily be quite straightforward with stoneware. Tuesday was a painful day for me. All morning Iwas trying to throw tall cylinders. I would get them around 10 inches and then they would just start warping on me. When I tried to work out the twist, they would shrink down in size by almost 2 inches.

I'm gonna have to post some photos of this weird phenomena next time it happens! (well, I'm hoping it won't happen again and in that case, you are out of luck seeing photo documentation).


So, I did what any decent potter worth her wait would do. I walked out of the pottery and proceeded to cry for an hour, managing to question my whole pottery existance asking all the while "what the heck am I doing trying to switch to a more difficult clay after all these years of getting stoneware where I want it?". I redeemed myself by then researching all the tips and pitfalls for throwing with porcelain and this is what I found out:


  1. limit water usage to almost nil. use slip instead

  2. go very slow when knuckling up to avoid warpage (this seems to be a big problem)

  3. use a blowtorch to stiffen things as you work

Well, two hours of crying/researching seemed to do the trick, because when I went back out to the pottery for a second "go", it seemed to go well!! I managed to do 10 inches, but beggers can't be chosers!

Yesterday I went at the clay again. This time with smaller items in mind. I decided to test the clay with molochite and without. To prepare myself, I had a bowl of slip, a bowl of water, blowtorch and batts ready to go:


Although I feel great about the day's throwing achievements, feeling like I may just figured this darned clay out, I'm finding the whole process tedious!!! With stoneware I can just be fluid, quick and in control without much effort at all anymore. With semi-porcelain, the whole process is more disjointed and lengthy:

1. prep batt on wheel. batt essential as I find clay very unforgiving once thrown

2. get clay wet with slurry NOT water!

3. throw clay slowly over 4-5 pulls. more than the ideal 3, but hey, what can I say? tenderness is key. fight the slump! everytime I shape inward, clay seems to get shorter. fighting this results in that 4th to 5th pull! this really slows me down!

4. clean all slurry from pot to ease in drying

5. blowtorch 30 seconds for small piece, 45 seconds for medium, etc...

6. list off gently with batt in tow

As a result of following these steps, I managed to throw the following:


Unfortunately, following these steps tends to take the immediacy and excitement out of throwing that I grew accustomed to with stoneware!? Wow - whiteness does come at a price!

They say that this semi-porcelain is actually much better to work with that normal porcelian. Damn, I wouldn't want to experience that nightmare.

I do have to say that to get this stuff working how I want it to, I really think my experience with throwing is the only thing getting me through this stage. I cannot even imagine what the poor souls who use this stuff as their first experience on the wheel must think about their abilities with clay? I hope they don't blame themselves.

I will fight on darn-it. I have invested too many hours with clay testing, slip and glaze development to throw in the towel now. In fact, the ironic thing about this whole experience is how much I now appreciate my stoneware clay. The whole reason I went into this process was to replace stoneware with a more exciting fresh look. Now I feel it is the stoneware that is more exciting to work with and the porcelain more exciting to look at.

What is a girl to do?